Android Studio / 안드로이드 앱만들기 공부8 / 테이블 레이아웃 / 격자형식 열과 행으로 만들기 / 칸맞추기
꾸준히 하는건 아니지만 조금씩 하는걸로도 만족하면서 포스팅 계속하기!
안드로이드 앱만들기 8번째 테이블 레이아웃
테이블 레이아웃은 자주 사용되지 않지만 격자 형태의 레이아웃을 만들 때 유용하게 사용할 수 있다.
테이블 레이아웃 : 표나 엑셀 시트와 같은 형태로 화면을 구성하는 레이아웃
테이블 레이아웃도 각각의 행과 그 안에 여러 개의 열을 넣어 레이아웃을 구성한다.
TableRow라는 태그가 여러개 들어가는데 이 태그는 한 행을 의미함
TableRow 안에는 여러개의 뷰가 들어간다 이 뷰들은 각각의 열이 된다.
결과 : 레이아웃에 추가된 TableRow의 개수가 행의 개수가 되고, 각 TableRow 마다 추가된 뷰의 개수가 열의 개수
테이블 에이아웃을 사용해보자
새 파일 만들기 SampleTableLayout
activity_main.xml 파일 -> Component Tree 에서 최상위 레이아웃에서 '우클릭' [Convert view...] 'LinearLayout'으로 변경
(최상위 레이아웃을 LinearLayout 으로 변경한 이유는 TableLayout을 선택할 수 없기 때문
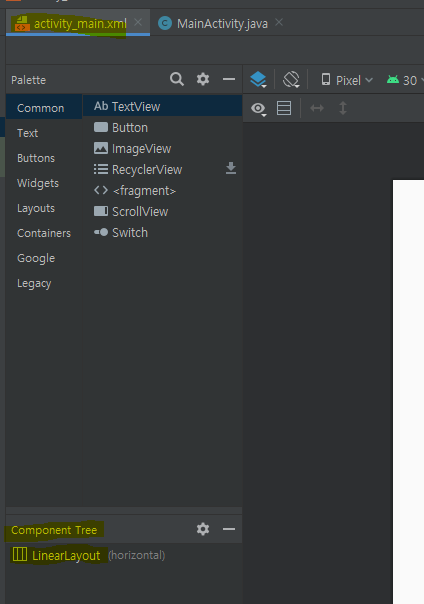
1. Palette 창에서 Layouts를 누르면 TableLayout이 나오는데 화면에 끌어다 놓기
2. TableRow 뷰를 찾아서 추가한다 TableRow 뷰는 한 번에 다섯 개가 추가된다 두개만 남기고 삭제

이렇게 추가된 TableRow를 보면 layout_width와 layout_height 속성 값이 모두 match_parent로 설정 되어있음
하나의 행으로 표시될 수 있도록 하려면 다른 작업을 해야함
1. TableRow 안에 세개의 버튼을 추가
2. 두번째 TableRow 안에도 세개의 버튼을 추가
(그냥 Palette의 Button을 끌어다가 Component Tree 안으로 끌어다 두면 버튼 생김)

만들어진 화면의 xml을 확인하면 이렇게 나오는데
쓸줄만 알면 xml을 하드코딩하는게 더 빠를거 같기도하다...
뭐 코드에 대해서는 딱히 설명하지 않아도 내가 알아보니 패스하겠다
<?xml version="1.0" encoding="utf-8"?>
<LinearLayout xmlns:android="http://schemas.android.com/apk/res/android"
    xmlns:app="http://schemas.android.com/apk/res-auto"
    xmlns:tools="http://schemas.android.com/tools"
    android:layout_width="match_parent"
    android:layout_height="match_parent"
    tools:context=".MainActivity">

    <TableLayout
        android:layout_width="match_parent"
        android:layout_height="match_parent">

        <TableRow
            android:layout_width="match_parent"
            android:layout_height="match_parent">

            <Button
                android:id="@+id/button1"
                android:layout_width="wrap_content"
                android:layout_height="wrap_content"
                android:text="Button" />

            <Button
                android:id="@+id/button2"
                android:layout_width="wrap_content"
                android:layout_height="wrap_content"
                android:text="Button" />

            <Button
                android:id="@+id/button3"
                android:layout_width="wrap_content"
                android:layout_height="wrap_content"
                android:text="Button" />
        </TableRow>

        <TableRow
            android:layout_width="match_parent"
            android:layout_height="match_parent">

            <Button
                android:id="@+id/button4"
                android:layout_width="wrap_content"
                android:layout_height="wrap_content"
                android:text="Button" />

            <Button
                android:id="@+id/button5"
                android:layout_width="wrap_content"
                android:layout_height="wrap_content"
                android:text="Button" />

            <Button
                android:id="@+id/button6"
                android:layout_width="wrap_content"
                android:layout_height="wrap_content"
                android:text="Button" />
        </TableRow>

    </TableLayout>

</LinearLayout>

** 버튼을 3개 추개하고 옆에 남는 공간이 없게 하고싶을때
<TableLayout> 태그에 stretchColumns 속성을 추가하면 된다
stretchColumns 가로 방향의 여유 공간이 있다면 그 여유 공간까지 모두 채워서 칼럼을 설정한다
0,1,2는 인덱스를 가리킨다 첫번째 칼럼은 0부터이니 3개의 버튼으로 0,1,2 를 채운다

xml 코드로보면

<TableLayout android:layout_width="match_parent" android:layouyt_height="match_parent" android:stretchColumns="0,1,2">
맨 뒤의 android:stretchCoulumns="0,1,2"가 추가되었다
* layout_span 이라는 속성을 이용해서 Text를 두칸을 차지하도록 해보자

layout_column이나 layout_span 속성을 지정할 수 있는데 <TableRow>태그 안에 추가하는 뷰는 순서대로 0,1,2 같은 칼럼 인덱스 값을 자동으로 부여받는다
layout_span은 뷰가 여러 칼럼에 걸쳐 있도록 만들기 위한 속성이다 뷰가 몇개의 칼럼을 차지할 것인지 숫자로 지정한다.
추가된 xml 내용은 이내용이다 Tablelayout 안에 TableRow로 들어 갔다.
        <TableRow
            android:layout_weight="wrap_content"
            android:layout_height="wrap_content">


            <EditText
                android:id="@+id/editTextTextPersonName"
                android:layout_width="wrap_content"
                android:layout_height="wrap_content"
                android:layout_span="2"
                android:ems="10"
                android:inputType="textPersonName"
                android:text="Name" />

            <Button
                android:id="@+id/button13"
                android:layout_width="wrap_content"
                android:layout_height="wrap_content"
                android:text="Button" />
        </TableRow>