
| 일 | 월 | 화 | 수 | 목 | 금 | 토 |
|---|---|---|---|---|---|---|
| 1 | 2 | 3 | 4 | 5 | 6 | 7 |
| 8 | 9 | 10 | 11 | 12 | 13 | 14 |
| 15 | 16 | 17 | 18 | 19 | 20 | 21 |
| 22 | 23 | 24 | 25 | 26 | 27 | 28 |
- 생활코딩
- 자바스크립트 객체
- 자바스크립트 배열 할당
- 자바스크립트
- 기획자랑 사이좋게 지내고 싶다
- 핵심만 골라 배우는 SwiftUI 기반의 iOS 프로그래밍
- 블록 스코프
- 맥 mysql
- 배열 분해 할당
- 한글입력 안됨
- 자바스크립트 class
- 한글입력 씹힘
- 객체지향
- jquery 사용하기
- 한글입력 잘림
- 한글입력 오류
- python tkinter 인터페이스
- 닐 스미스 지음
- 비주얼스튜디오 코드
- 맥 아파치
- 객체
- 한글잘림
- 황반석 옮김
- max MySQL
- 제이펍 출판
- python GUI 사용하기
- 제이쿼리연결
- SwiftUI 기반의 iOS 프로그래밍
- max apache
- 자바스크립트 객체 만들기
- Today
- Total
java,javascript,android,php,sql,공부용,메모용
바로가기 메뉴 만들기 탭메뉴 NavigationDrawer / Android Studio / 안드로이드 앱만들기 31 본문
바로가기 메뉴 만들기 탭메뉴 NavigationDrawer / Android Studio / 안드로이드 앱만들기 31
yy_dd2 2021. 4. 24. 23:37햄버거모양 바로가기 탭메뉴 만들기 웹이나 앱에서 자주 사용되는 기능이다.
왼쪽상단이나 오른쪽상단에 햄버거? 목록 모양을 누르면 나타나는 화면이 있는데
안드로이드에서는 NavigationDrawer 라고 한다
몇 개의 화면에서 공통으로 보여줄 수 있는 빠르게 메뉴 기능에 접근이 가능하기에
로그인한 사용자의 프로필 정보나 설정 메뉴를 보여줄 때도 사용할 수 있다.
(로그인, 프로필정보, 메뉴 같은것을 담고있다.)
- 바로가기 메뉴를 쉽고 빠르게 만드는 방법
안드로이드에서 첫화면의 유형으로 제공하는 것을 사용하는 것
시작화면에서 새로운 프로젝트를 만들때 유형 선택하기 NavigationDrawer Activity 를 선택하기
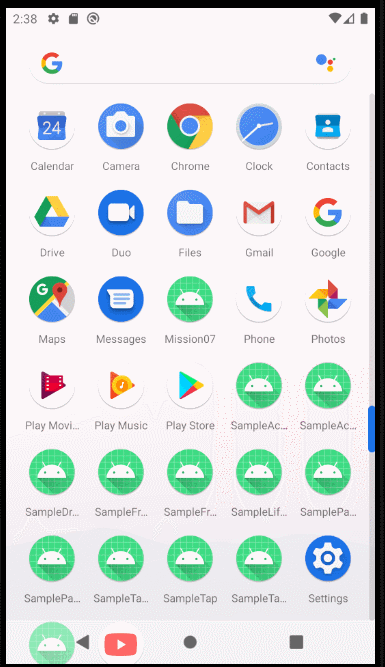
1. 프로젝트 생성 SampleDrawer
- 패키지 이름 변경 drawer (나는 변경안함)
2. 생성된 파일 확인 manifests
android:theme="@style/AppTheme.NoActionBar" 라는 부분이 있다
/app/res/values/styles .xml 파일을 열어보면
AppTheme.NoActionBar 라는 이름이 있는 <style> 확인가능
<?xml version="1.0" encoding="utf-8"?>
<manifest xmlns:android="http://schemas.android.com/apk/res/android"
    package="com.togapp.sampledrawer">

    <application
        android:allowBackup="true"
        android:icon="@mipmap/ic_launcher"
        android:label="@string/app_name"
        android:roundIcon="@mipmap/ic_launcher_round"
        android:supportsRtl="true"
        android:theme="@style/AppTheme">
        <activity
            android:name=".MainActivity"
            android:label="@string/app_name"
            android:theme="@style/AppTheme.NoActionBar">
            <intent-filter>
                <action android:name="android.intent.action.MAIN" />

                <category android:name="android.intent.category.LAUNCHER" />
            </intent-filter>
        </activity>
    </application>

</manifest>
<resources>
<!-- Base application theme. -->
<style name="AppTheme" parent="Theme.AppCompat.Light.DarkActionBar">
<!-- Customize your theme here. -->
<item name="colorPrimary">@color/colorPrimary</item>
<item name="colorPrimaryDark">@color/colorPrimaryDark</item>
<item name="colorAccent">@color/colorAccent</item>
</style>
<style name="AppTheme.NoActionBar">
<item name="windowActionBar">false</item>
<item name="windowNoTitle">true</item>
</style>
<style name="AppTheme.AppBarOverlay" parent="ThemeOverlay.AppCompat.Dark.ActionBar" />
<style name="AppTheme.PopupOverlay" parent="ThemeOverlay.AppCompat.Light" />
</resources>
이렇게 설정되어있으면 기본 테마가 아닌 상단의 액셥나가 없는 스타일로 테마가 설정되어 있다.
상단의 액션바가 없어졌으니, activity_main.xml 파일에서 직업 액션바를 만들어준다.
3. activity_main.xml 파일의 내용과 구조 확인하기
프로젝트를 만들때 이미 만들어진 내용이 있으니
activity_main.xml 파일에 액션바가 있어야하는데
그 대신 액션바를 만들어둔 xml 파일의 내용이 작성되어있다.
(별도의 xml 파일로 분리되어있다는 이야기)
app_bar_main.xml 파일이 그 파일인데 그 안을 보면 액션바를 포함해 다른 레이아웃들이 들어있다.
<?xml version="1.0" encoding="utf-8"?>
<androidx.drawerlayout.widget.DrawerLayout xmlns:android="http://schemas.android.com/apk/res/android"
    xmlns:app="http://schemas.android.com/apk/res-auto"
    xmlns:tools="http://schemas.android.com/tools"
    android:id="@+id/drawer_layout"
    android:layout_width="match_parent"
    android:layout_height="match_parent"
    android:fitsSystemWindows="true"
    tools:openDrawer="start">

    <include
        layout="@layout/app_bar_main"
        android:layout_width="match_parent"
        android:layout_height="match_parent" />

    <com.google.android.material.navigation.NavigationView
        android:id="@+id/nav_view"
        android:layout_width="wrap_content"
        android:layout_height="match_parent"
        android:layout_gravity="start"
        android:fitsSystemWindows="true"
        app:headerLayout="@layout/nav_header_main"
        app:menu="@menu/activity_main_drawer" />
</androidx.drawerlayout.widget.DrawerLayout>
include 인크루드해서 layout/app_bar_main을 불러왔고 그아래 NavigationView가 있다
이 뷰는 평소에는 보이지 않다가 햄버거 모양 아이콘을 누를때만 보이게 된다.
이런 동작을 하기 위에서는 최상위 레이아웃은 DrawerLayout으로 설정되어있다.
책에서는 app_bar_main으로 분리되어 있는 것보다
하나로 통합되어야 구조 확인이 편리하다 하여 통합한다고 한다.
- app_bar_main.xml 내용 확인
<?xml version="1.0" encoding="utf-8"?>
<androidx.coordinatorlayout.widget.CoordinatorLayout xmlns:android="http://schemas.android.com/apk/res/android"
    xmlns:app="http://schemas.android.com/apk/res-auto"
    xmlns:tools="http://schemas.android.com/tools"
    android:layout_width="match_parent"
    android:layout_height="match_parent"
    tools:context=".MainActivity">

    <com.google.android.material.appbar.AppBarLayout
        android:layout_width="match_parent"
        android:layout_height="wrap_content"
        android:theme="@style/AppTheme.AppBarOverlay">

        <androidx.appcompat.widget.Toolbar
            android:id="@+id/toolbar"
            android:layout_width="match_parent"
            android:layout_height="?attr/actionBarSize"
            android:background="?attr/colorPrimary"
            app:popupTheme="@style/AppTheme.PopupOverlay" />

    </com.google.android.material.appbar.AppBarLayout>

    <include layout="@layout/content_main" />

    <com.google.android.material.floatingactionbutton.FloatingActionButton
        android:id="@+id/fab"
        android:layout_width="wrap_content"
        android:layout_height="wrap_content"
        android:layout_gravity="bottom|end"
        android:layout_margin="@dimen/fab_margin"
        app:srcCompat="@android:drawable/ic_dialog_email" />

</androidx.coordinatorlayout.widget.CoordinatorLayout>
- content_main.xml 내용 확인
<?xml version="1.0" encoding="utf-8"?>
<androidx.constraintlayout.widget.ConstraintLayout xmlns:android="http://schemas.android.com/apk/res/android"
    xmlns:app="http://schemas.android.com/apk/res-auto"
    xmlns:tools="http://schemas.android.com/tools"
    android:layout_width="match_parent"
    android:layout_height="match_parent"
    app:layout_behavior="@string/appbar_scrolling_view_behavior"
    tools:showIn="@layout/app_bar_main">

    <fragment
        android:id="@+id/nav_host_fragment"
        android:name="androidx.navigation.fragment.NavHostFragment"
        android:layout_width="match_parent"
        android:layout_height="match_parent"
        app:defaultNavHost="true"
        app:layout_constraintLeft_toLeftOf="parent"
        app:layout_constraintRight_toRightOf="parent"
        app:layout_constraintTop_toTopOf="parent"
        app:navGraph="@navigation/mobile_navigation" />

</androidx.constraintlayout.widget.ConstraintLayout>
이 내용들을 모두 합친다면
content_main.xml의 내용이 app_bar_main.xml안에 들어가고 app_bar_main.xml 내용이 activity_main.xml 안에 들어갈것
<?xml version="1.0" encoding="utf-8"?>
<androidx.drawerlayout.widget.DrawerLayout xmlns:android="http://schemas.android.com/apk/res/android"
    xmlns:app="http://schemas.android.com/apk/res-auto"
    xmlns:tools="http://schemas.android.com/tools"
    android:id="@+id/drawer_layout"
    android:layout_width="match_parent"
    android:layout_height="match_parent"
    android:fitsSystemWindows="true"
    tools:openDrawer="start">

    <androidx.coordinatorlayout.widget.CoordinatorLayout
        android:layout_width="match_parent"
        android:layout_height="match_parent">

        <com.google.android.material.appbar.AppBarLayout
            android:layout_width="match_parent"
            android:layout_height="wrap_content"
            android:theme="@style/AppTheme.AppBarOverlay">

            <androidx.appcompat.widget.Toolbar
                android:id="@+id/toolbar"
                android:layout_width="match_parent"
                android:layout_height="?attr/actionBarSize"
                android:background="?attr/colorPrimary"
                app:popupTheme="@style/AppTheme.PopupOverlay" />

        </com.google.android.material.appbar.AppBarLayout>

        <fragment
            android:id="@+id/container"
            android:layout_width="match_parent"
            android:layout_height="match_parent"
            app:layout_behavior="@string/appbar_scrolling_view_behavior" >

        </fragment>

    </androidx.coordinatorlayout.widget.CoordinatorLayout>

    <com.google.android.material.navigation.NavigationView
        android:id="@+id/nav_view"
        android:layout_width="wrap_content"
        android:layout_height="match_parent"
        android:layout_gravity="start"
        android:fitsSystemWindows="true"
        app:headerLayout="@layout/nav_header_main"
        app:menu="@menu/activity_main_drawer" />

</androidx.drawerlayout.widget.DrawerLayout>
FrameLayout의 속성으로 app:layout_behavior 속성을 주는데
coordinatorLayout 안에서 해단 레이아웃이나 스크롤 등 작업이 진행될 때
면적같은 것들이 자동으로 계산하도록 만들어주는 속성
4. menu.xml 파일 수정
MainActivity.java의 파일에 코드를 추가하기 전에
/app/res/menu/menu.xml 파일을 수정하자 id부분에 menu1.2.3 으로 수정함
<?xml version="1.0" encoding="utf-8"?>
<menu xmlns:android="http://schemas.android.com/apk/res/android"
    xmlns:tools="http://schemas.android.com/tools"
    tools:showIn="navigation_view">

    <group android:checkableBehavior="single">
        <item
            android:id="@+id/menu1"
            android:icon="@drawable/ic_menu_camera"
            android:title="Import" />
        <item
            android:id="@+id/menu2"
            android:icon="@drawable/ic_menu_gallery"
            android:title="@string/menu_gallery" />
        <item
            android:id="@+id/menu3"
            android:icon="@drawable/ic_menu_slideshow"
            android:title="@string/menu_slideshow" />
    </group>
</menu>
5. MainActivity.java 파일
수정할 내용이 많고 빠진 내용 주석걸린 내용이 많은데
( import 부분에는 주석으로 내용을 지워 사용하지 않는게 많음 )
package com.togapp.sampledrawer;

import android.os.Bundle;
import android.view.Gravity;
import android.view.MenuItem;
import android.view.View;
import android.view.Menu;
import android.widget.Toast;

import com.google.android.material.floatingactionbutton.FloatingActionButton;
import com.google.android.material.snackbar.Snackbar;
import com.google.android.material.navigation.NavigationView;

import androidx.appcompat.app.ActionBarDrawerToggle;
import androidx.core.view.GravityCompat;
import androidx.fragment.app.Fragment;
import androidx.navigation.NavController;
import androidx.navigation.Navigation;
import androidx.navigation.ui.AppBarConfiguration;
import androidx.navigation.ui.NavigationUI;
import androidx.drawerlayout.widget.DrawerLayout;
import androidx.appcompat.app.AppCompatActivity;
import androidx.appcompat.widget.Toolbar;

public class MainActivity extends AppCompatActivity
implements NavigationView.OnNavigationItemSelectedListener, FragmentCallback{

    //private AppBarConfiguration mAppBarConfiguration;
    Fragment1 fragment1;
    Fragment2 fragment2;
    Fragment3 fragment3;

    DrawerLayout drawer;
    Toolbar toolbar;

    @Override
    protected void onCreate(Bundle savedInstanceState) {
        super.onCreate(savedInstanceState);
        setContentView(R.layout.activity_main);

        toolbar = findViewById(R.id.toolbar);
        setSupportActionBar(toolbar);

        /*FloatingActionButton fab = findViewById(R.id.fab);
        fab.setOnClickListener(new View.OnClickListener() {
            @Override
            public void onClick(View view) {
                Snackbar.make(view, "Replace with your own action", Snackbar.LENGTH_LONG)
                        .setAction("Action", null).show();
            }
        });*/

        drawer = findViewById(R.id.drawer_layout);
        ActionBarDrawerToggle toggle =
        	new ActionBarDrawerToggle(this, drawer, toolbar,
            			R.string.navigation_drawer_open, R.string.navigation_drawer_close);
        drawer.addDrawerListener(toggle);
        toggle.syncState();

        NavigationView navigationView = findViewById(R.id.nav_view);
        navigationView.setNavigationItemSelectedListener(this);

        fragment1 = new Fragment1();
        fragment2 = new Fragment2();
        fragment3 = new Fragment3();

        getSupportFragmentManager().beginTransaction()
        	.add(R.id.container, fragment1).commit();

        // Passing each menu ID as a set of Ids because each
        // menu should be considered as top level destinations.
       /*mAppBarConfiguration = new AppBarConfiguration.Builder(
                R.id.nav_home, R.id.nav_gallery, R.id.nav_slideshow)
                .setDrawerLayout(drawerLayout)
                .build();*/
       //NavController navController = Navigation.findNavController(this, R.id.nav_host_fragment);
       //NavigationUI.setupActionBarWithNavController(this, navController, mAppBarConfiguration);
       //NavigationUI.setupWithNavController(navigationView, navController);
    }

    /*
    @Override
    public boolean onCreateOptionsMenu(Menu menu) {
        // Inflate the menu; this adds items to the action bar if it is present.
        getMenuInflater().inflate(R.menu.main, menu);
        return true;
    }

    @Override
    public boolean onSupportNavigateUp() {
        NavController navController = Navigation.findNavController(this, R.id.nav_host_fragment);
        return NavigationUI.navigateUp(navController, mAppBarConfiguration)
                || super.onSupportNavigateUp();
    }
    */

    @Override
    public void onBackPressed() {
        if (drawer.isDrawerOpen(GravityCompat.START)){
            drawer.closeDrawer(GravityCompat.START);
        } else {
            super.onBackPressed();
        }
    }

    @Override
    public boolean onNavigationItemSelected(MenuItem item){
        int id = item.getItemId();

        if (id == R.id.menu1){
            Toast.makeText(this, "첫 번째 메뉴 선택됨", Toast.LENGTH_LONG).show();
            onFragmentSelected(0,null);
        } else if (id == R.id.menu2){
            Toast.makeText(this, "두 번째 메뉴 선택됨", Toast.LENGTH_LONG).show();
            onFragmentSelected(1,null);
        } else if (id == R.id.menu3){
            Toast.makeText(this, "세 번째 메뉴 선택됨", Toast.LENGTH_LONG).show();
            onFragmentSelected(2,null);
        }

        drawer.closeDrawer(GravityCompat.START);
        return true;
    }

    @Override
    public void onFragmentSelected(int position, Bundle bundle){
        Fragment curFragment = null;

        if (position == 0){
            curFragment = fragment1;
            toolbar.setTitle("첫 번째 화면");
        } else if (position == 1){
            curFragment = fragment2;
            toolbar.setTitle("두 번째 화면");
        } else if (position == 2){
            curFragment = fragment3;
            toolbar.setTitle("세 번째 화면");
        }

        getSupportFragmentManager().beginTransaction()
        	.replace(R.id.container, curFragment).commit();

    }


}
6. interface 파일 FragmentCallback 파일 추가
맨 처음에 implements 한부분에 FragmentCallback 파일을 추가하자

package com.togapp.sampledrawer;

import android.os.Bundle;

public interface FragmentCallback {

    void onFragmentSelected(int position, Bundle bundle);
}
이 파일은 어떤 프래그먼트를 보여줄지 선택하는 메서드를 포함하고 있다.
7. 실행결과
github.com/young-0112/SampleDrawer
xml 코드를 합치지 않고 프로젝트 생성시 생성되는 파일로 구현하는 방법도 해볼것


